Mahogany Metallic 37
How To Remove Door Window Trim
Author: Jim Ruby - 2007
Purpose
This CVOA "how to" document provides detailed instruction on how to remove the Chevrolet Vega door window molding without damaging the car finish or the molding.
Brief
After having owned a number of Vegas over the last 30 years, I have tried several times to remove the door window pillar moldings intact without damage. My earlier attempts were met with very little success.
Recently I had the need for some moldings for my Kammback doors. This time I decided to contact an expert, Dave Quarterman of "Dave's Vega Village".
Dave Quarterman (Daves Vega Village) who is well known in the classic Vega automobile community, has worked with Vegas for over three decades. Dave also sells used Vega parts as well as his own line of high quality, reproduction front bumper valances and wind deflectors.
The Procedure
To remove those window edge moldings, you need to use tools that are softer than the polished anodized aluminum of which they are made. For tools, I used a couple of plastic bondo applicators and a hammer.
STEP 1
Secure door in upright position and stabilize. If the door is still on the car, its all the easier.
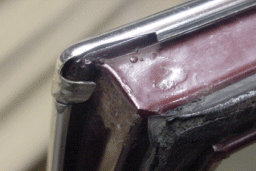
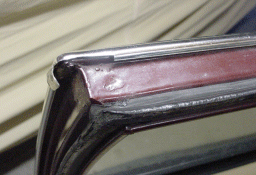
Open the tab slightly on the top molding at the leading edge, enough to clear the body painted steel door / window frame beneath. (pic 1 & pic 2)
STEP 2
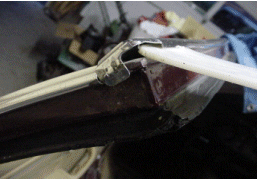
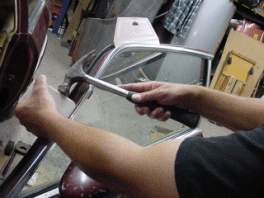
Start at the top of the un-crimped edge and slide the tapered side of the applicator between the molding and the door frame. Slowly work the applicator across the top of the window frame. As some moldings may be tighter than others, you may need the use of a hammer to lightly tap the applicator along being careful not to hit the molding. (pic 3, pic 4, pic 5)
When you get to the end of the molding down by the mirror, you will have the top of the molding completely released from the window frame.
STEP 3
Now you just need to gently tweak and push down on the molding to release the lower molding bottom edge. (pic 6)
STEP 4
To reinstall, start by lining up the top of the molding lip over the door frame and gentle push down to secure the top, then palm and thumb the lower edge back into plate with a snap. (pic 7)
The side trim molding may be removed with the same process.
It took me approximately 20 minutes the first time, now less than 2 minutes with absolutely no damage at all.
Be gentle, or these moldings will show distortion very easily.

Pic 1

Pic 2

Pic 3

Pic 4

Pic 5

Pic 6


